A Very Basic
Introduction to Tactics
(Tac 101)
This page is intended as a very basic introduction to Civil War
era tactics. Many of the principles apply to different degrees on
different scales to other eras. Those familiar with ground combat can
easily skip this page, and go on to the First
Day of Fighting page. Those less familiar with combat might wish
to pick up a few basic principles that help understand how the field
was used.
The basic formation for both attack and defense was the line. Men
fought two ranks deep. By holding a line formation, the maximum
number of men could fire towards the enemy without risk of hitting
one of their own people.
|
|
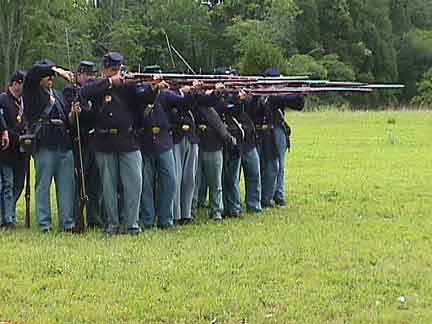
A Union reenactment company demonstrates a small line
formation. Here, the front rank is ready to fire as the rear
rank reloads. Note the ramrods of the men in the back rank
as they push the powder and bullet to the bottom of their
barrels. Two deep is the practical limit, the most common
depth of a line. Men were spaced 28 inches apart. Thus, 20
men in a line two ranks deep would cover a line 280 inches
wide, or 23 feet. An under strength regiment of 200, ten
companies similar to the one shown above, standing side to
side, might cover a front of 230 feet.
|
Organization
The above is an undersized company, about 20 men. Normally,
25 to 40 man companies were more common. With ten companies in a
regiment, most regiments had roughly 250 to 400 men. Regiments
at the beginning of the war were larger, sometimes approaching 1000
men, but reinforcements generally came as new regiments, rather than
as soldiers to fill out veteran units. Thus, older regiments became
smaller. Eventually, several old small regiments might be combined to
create one effective regiment. A regiment is normally led by a
colonel, though majors often assumed and maintained command of
regiments.
Three to five regiments might be combined to form a
brigade, roughly 1,500 men,generally led by a brigadier
general. Two to four brigades form a division, about 5,000
men, led by a brigadier or major general. Two to three divisions form
a corps, about 15,000 men, led by a major general. Armies were
also led by a major general. The armies at Gettysburg were somewhat
under 100,000 men one each side.
(The next rank higher than major general was
Lieutenant General. The first US general to hold this rank was George
Washington. There was a reluctance through much of the Civil War to
promote a second man to a matching rank. Thus, a division, corps and
army commander might all have the same rank. Eventually, U.S. Grant
became the second Lieutenant General.)
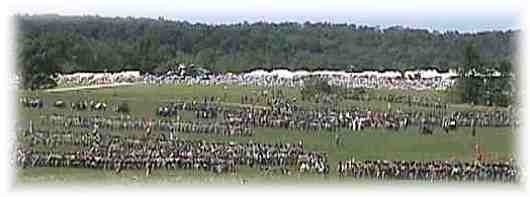
The
135th anniversary reenactment of Pickett's
Charge
Lots of reenactors here, but their regimental fronts are
still smaller than historical.
The Confederate units were generally larger then their Union
opposites. In the maps shown in these pages, Union Corps are
frequently shown in roman numerals, while confederate divisions are
shown by the name of their commander. This is how the two armies
identified units during the war. I have decided to show 7 Union corps
and 9 Confederate divisions on the maps as this gives the largest
number of units that can be reasonably shown on a map that downloads
on the web reasonably quick.
The AoP had seven corps and Gettysburg, which is a high number of
units for a single general to command. A general will only be able to
handle two or three units. Thus, the Union quite often used "wing
commanders," generals in charge of two or three corps, creating an
temporary level of command between the corps and the army. Thus,
Reynolds commanded the I, II and XI Corps at the start of July 1,
while Hancock, Warren and others at times held command over parts of
the field.
The Army of Northern Virginia had only three Corps, thus had less
need for wing commanders.
Attack v
Defense
The defender can load and fire at the maximum rate. Civil War
muskets were muzzle loaders, impossible to load while moving. The
attacker would have to pause exposed to return fire. The defender can
also choose high ground with cover, while forcing the attacker to
expose himself on open ground.
It is not an accident that this page was done with attackers in
blue, the color for the Union on my illustrations, while the attacker
is in Red, the color used for Confederates. (Gray doesn't show well
against the green and white Bryce maps.) While there minor
exceptions, the Confederates held the 'initiative' for the entire
battle. Lee chose the time and place of the attack, and thus had the
attacker's advantages.
Confederate forces, especially on July 2nd, were pressuring the
Union flank positions. During the Civil War, if one's flank is
turned, holding one's position was essentially impossible. The
flanked unit would be forced to withdraw. On the afternoon of July
1st, the Confederates turned both flanks of the Union force north of
town, forcing the Union to retreat in disorder. On July 3rd, the
Union was able to turn both flanks of Pickett's Charge, with a
similar result.
The defender would respond to a flank maneuver by curving their
lines away from the attacker to make their flanks difficult to reach.
In turning Pickett's Charge, they were also able to pivot forward to
hit Pickett's and Pettigrew's flank. Both the 20th Main at Little
Round Top and the 69th Pennsylvania at the Angle refused their
flanks, curling their lines back. (While the
above illustration shows a unit both refusing a flank and pivoting
forward to hit an opposing flank, doing both at once is highly
unusual. To my knowledge, nothing similar to the above illustration
occurred at Gettysburg, though both maneuvers were used by different
units during the height of the attack on the Angle.)
As a result of Confederate efforts to stretch towards Union
flanks, and Union efforts to protect their flanks, the Confederates
had exterior lines. This is especially true near Culp's and Cemetery
Hills. There, Union troops were often moved from one threatened point
to another. The Confederate troops east of town were isolated, could
not quickly help other units or be helped by other units.
Next : The
First Day